Semi-Solid State Battery Integration for Robotics
I have integrated semi-solid state battery packs into warehouse AMRs, hospital delivery robots, quadruped inspection platforms and one very unforgiving automated forklift, and the pattern is always the same. The cell is rarely the reason a robot program fails. Integration is. A 350 Wh/kg cell that cannot survive the regen profile of a 700 kg payload platform is a lab curiosity, not a product.
This article is the integration playbook I use when a robotics team hands me a chassis drawing and a duty cycle and asks, “can you make semi-solid work in here?” It is deliberately narrower than the design and testing articles in this series. Design asks what the pack should be. Integration asks whether it survives contact with a machine that accelerates 400 times a shift, brakes into a downhill ramp, gets swapped by a technician in 40 seconds, and reports its state of charge to a fleet manager that will ruthlessly reassign it if the number is wrong.
Everything below comes from builds I have signed off on, including the numbers I got wrong the first time. Where a figure is a design target rather than a measured result, I say so.
One note on sourcing. Semi-solid cells are not a commodity yet, and the difference between a good lithium battery manufacturer and a mediocre one shows up in lot-to-lot DCIR consistency and in whether they will share stack-pressure data at all. If you are buying cells and building in-house, treat cell qualification as a six-month programme. If you are buying a custom battery solution, make the integrator own the duty-cycle model, the regen interface and the compliance file, because those are the three places robotics programmes actually fail.
Step 1: Size Energy From the Duty Cycle, Not the Datasheet
The single most common integration error I see is a robot team specifying “a 48 V, 100 Ah pack” because that is what the previous generation used. Then the new platform adds a 150 W perception stack and a lift actuator, the shift extends from 8 to 10 hours, and the robot dies at hour seven in the far aisle.
I build the energy budget at the battery terminals, block by block, and I always divide by system efficiency rather than multiplying nameplate capacity by a fudge factor. Here is the budget for a 500 kg payload AMR running a 10-hour shift in a flat distribution centre:
| Load block | Power | Duty | Energy per shift |
|---|---|---|---|
| Traction, cruising average | 340 W | 55% moving | 1 870 Wh |
| Traction peaks (accel, grade, carpet seams) | 2 600 W for 2 s | 400 events | 145 Wh |
| Perception compute, lidar, cameras | 150 W | 100% | 1 500 Wh |
| Lift / conveyor actuator | 700 W for 6 s | 250 cycles | 292 Wh |
| Comms, lighting, quiescent draw | 35 W | 100% | 350 Wh |
| Subtotal at load | 4 157 Wh | ||
| Divide by drivetrain + DC/DC efficiency (0.90) | 4 620 Wh at pack terminals |
Now the pack. A semi-solid pack at 210–240 Wh/kg pack level gives me 3.2 kWh in 13–15 kg. With a usable window of 10–95% SoC — I do not let fleet packs sit at the rails — that is 2.72 kWh per full cycle. Two 12-minute opportunity charges at roughly 2.5 C, derated for the CV taper, return about 1.15 kWh each. Total available: 5.0 kWh against 4.62 kWh demanded. That 8% margin is the smallest I will accept on a fleet deployment, and I would rather see 15%.
A note on how I got here: the battery pack design sequence is to fix the energy budget first, then the string configuration, then the mechanical envelope — never the reverse. Starting from a box that fits and asking how many amp-hours you can cram into it is how you end up with a pack that meets the drawing and misses the shift.
Compare the same energy in a conventional liquid NMC lithium battery pack at 160–190 Wh/kg: 17–20 kg. On a 130 kg AMR, 4 kg sounds trivial until you run the braking distance and the ramp climb, and it shows up again in Step 4 as a centre-of-gravity problem.
Step 2: The 60 V SELV Wall, and Why I Specify 13S Instead of 14S
Everything under 60 V DC stays in the SELV/PELV domain under IEC 61140 and IEC 60204-1, which means no shock-protection engineering, no creepage studies, no orange-cable-and-interlock regime on every service panel. Cross that line and your machine cost structure changes permanently. Robot builders know this. What they forget is that regenerative braking and charge recovery push the DC bus up, and that margin is what keeps you under 60 V.
Semi-solid cells in the chemistry we build with are nickel-rich NMC with a gel-polymer electrolyte: 3.65–3.70 V nominal, 4.20 V charge cutoff, 2.80 V discharge cutoff. Two string options present themselves:
- 14S — 51.8 V nominal, 58.8 V at full charge. Looks perfect on paper. In service it leaves 1.2 V before you breach 60 V, and a single unclamped regen event on a cold pack at high SoC will take you there. I have watched it happen.
- 13S — 48.1 V nominal, 54.6 V at full charge, 5.4 V of headroom. The nameplate looks wrong to a mechanical engineer expecting “48 V”, but every 48 V motor drive on the market accepts 39–58 V, and the regen headroom is worth far more than a rounder number.
The counter-argument is the bottom of the window. 13S at 2.80 V/cell is 36.4 V, below the 38–42 V undervoltage lockout of most 48 V drives. That costs you nothing in practice: on an NMC discharge curve, only about 4–6% of capacity sits below 3.05 V/cell, so setting the BMS discharge floor at 3.05 V (39.7 V) still releases 94–96% of the pack while keeping the drive alive. I set the robot’s functional low-SoC alarm at 3.20 V/cell (41.6 V) so it returns to dock before the drive ever sees UVLO.
For a 3.2 kWh pack I typically land on 13S2P with 35 Ah semi-solid pouch cells, giving 70 Ah and 3.37 kWh nominal. Two parallel strings also give me a second current path, which matters in Step 3.
Step 3: Peak Current, Regenerative Braking, and the Charge-Acceptance Ceiling
Traction peaks are easy. 2 600 W at 48 V is 54 A; add the lift actuator and you are at about 70 A, roughly 1 C on a 70 Ah pack. Nothing about that challenges a modern semi-solid cell.
Regeneration is where integration programmes break, and it breaks for a chemical reason, not an electrical one. A semi-solid cell has measurably higher interfacial impedance than the equivalent liquid cell — call it 1.2–1.8 mΩ per 35 Ah cell against 0.6–1.0 mΩ — and that impedance climbs steeply at low temperature and high SoC. The consequence is a hard ceiling on how fast the cell will accept charge, and regen is charge.
The energy per stop is small. Braking 700 kg from 1.5 m/s to rest is only ½mv² ≈ 790 J. But descending a 20 m mezzanine ramp with the same mass is mgh ≈ 137 kJ, or 38 Wh, and a robot doing 100 descents a shift hands you 3.8 kWh of energy you must absorb. The power during those descents is 1–1.6 kW continuous, and the pack is often above 90% SoC at the top of the ramp because it charged at the previous dock.
Never let the BMS hard-open on a regen overvoltage
This is the rule I write into every integration spec, and it is non-negotiable. If the BMS opens the contactor because regen pushed a cell past 4.20 V, the robot instantly loses braking torque. On a ramp, that is a runaway. Electromagnetic brakes are fail-safe in the sense that they hold when de-energised, but engaging one at 1.5 m/s is an emergency stop, not a stop — you get a hard jerk, a possible load shift, and a safety event that has to be investigated.
The architecture that works has three layers:
- Broadcast a regen current limit. The BMS publishes max-charge-current at 10 Hz over CAN, computed from the hottest cell temperature, the highest cell voltage and the measured DCIR. Typical values: full regenerative current below 80% SoC and above 20 °C; taper to 0.5 C between 80–90% SoC; 0.1–0.2 C above 90% SoC or below 10 °C.
- Robot controller obeys it. The motion planner treats the limit as a hard constraint and, when it cannot absorb the power, blends in the friction brake or bleeds it into a braking resistor. This is a control-loop requirement, not a battery requirement, and it has to be in the interface control document.
- Clamp before you open. If the limit is violated anyway, the BMS commands a controlled stop through the safety path and only opens the contactor once torque is zero and the brake is set. Cell overvoltage should be a latching fault with a 1–2 s delay, with a separate non-delayed hardware trip at 4.30 V.
Sub-second pulses: DC-link capacitance, not more cells
Legged platforms are a different animal: 8–15 C for 0.2–1 s. Sizing cells for that is economic nonsense. Work the impedance budget instead. A 13S string of 35 Ah semi-solid cells at 1.5 mΩ each, two parallel, gives 9.75 mΩ of cell resistance; add busbars, contactor, fuse and harness and you are at 13–16 mΩ at the terminals. At 700 A (10 C) that is a 9–11 V sag on a 48 V bus — 20%, and your drive will brown out.
The fix is local energy storage. Size a film DC-link capacitor at roughly 1–3 mF per 100 A of peak current to handle the switching-frequency ripple, then add a 48 V ultracapacitor module for anything longer than about 100 ms. The usable energy is E = ½C(Vmax² − Vmin²); a 48 V, 165 F module discharged to 36 V yields about 83 kJ, which covers a long sequence of dynamic steps. It costs 11–14 kg, and on a legged robot that is still cheaper than buying the same capability in cells.
Step 4: Mechanical Integration — Envelope, Centre of Gravity, and Stack Pressure
Packaging and centre of gravity
I want the pack low and central, in the chassis cavity between the drive wheels, not in a rear bay. Moving 15 kg from a rear compartment 250 mm behind the axle to a central bay 40 mm above the floor changes tip-over behaviour measurably under ISO 3691-4 or ANSI/RIA R15.08 testing, and it improves braking on polished concrete. The semi-solid pack’s 3–5 kg mass advantage over liquid NMC is not the headline benefit on a robot — the headline is that you can put that mass where you want it.
Stack pressure: the semi-solid requirement that liquid packs never had
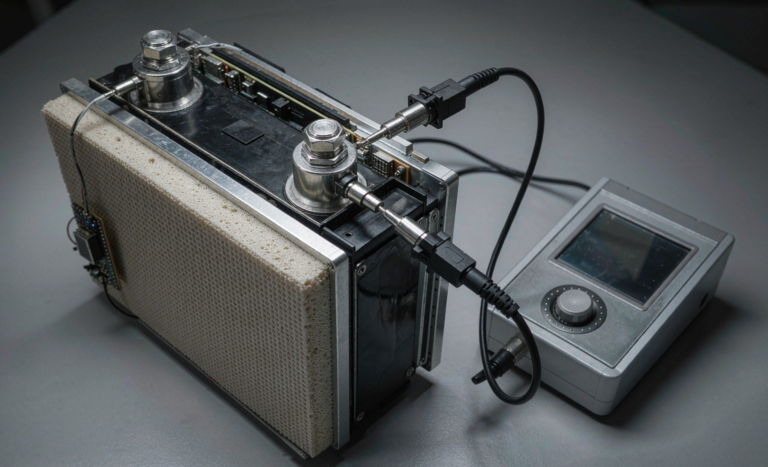
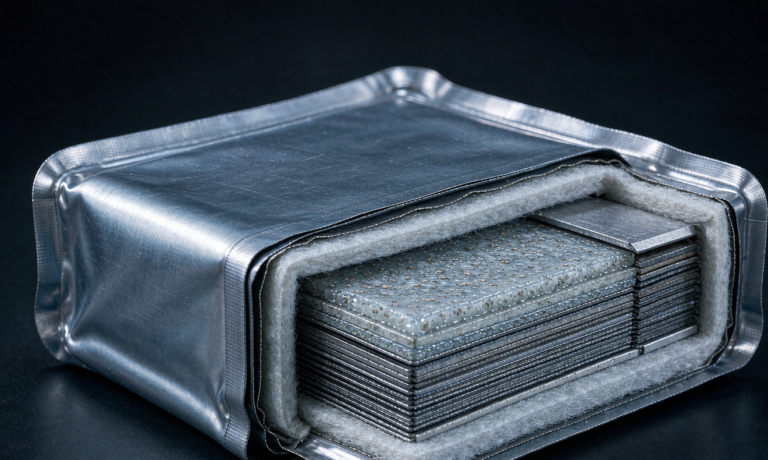
This is the one that catches experienced mechanical teams out, because nothing in their liquid-cell experience prepares them for it. A semi-solid cell needs a maintained, uniform compressive load on the electrode stack. Too little and you get delamination at the electrolyte–electrode interface, which shows up as localized lithium plating and a capacity knee at 300–400 cycles. Too much and you squeeze electrolyte out of the separator, interfacial impedance rises 15–30%, and you trade one failure mode for another.
What I specify:
- Target pressure 0.05–0.30 MPa (roughly 0.5–3 kgf/cm²) applied perpendicular to the stack face. This is an order of magnitude below what true all-solid-state cells demand, which is why semi-solid is practical in mobile equipment at all.
- Compliance layer of 0.5–1.0 mm closed-cell silicone foam or a Belleville washer stack, pre-compressed 10–20%, to absorb the 2–4% irreversible plus reversible thickness growth the stack exhibits over life.
- Stiffness, not springs. The module frame must hold the pressure independent of the enclosure. I have measured a 40% pressure loss on a design where the pack enclosure carried the load and the sheet metal relaxed under vibration.
- Verification. Pressure-sensitive film at build, then thickness measurement at 0 and 500 cycles. If the frame has relaxed, you will see it in the DCIR trace long before you see it in capacity.
Vibration, shock and ingress
Semi-solid cells are, if anything, better in vibration than liquid cells: there is no free electrolyte to slosh, and no stratification. The failure mode shifts to the interconnects. I test to IEC 60068-2-64 random vibration, 5–500 Hz at 1.0–2.5 Grms for 1–3 hours per axis, plus IEC 60068-2-27 half-sine shock at 15–30 g / 6–11 ms for the curb-strike and dock-collision cases. Nickel-plated copper busbars laser-welded to the tabs, with a service loop so the cell stack is not the load path, survive this; bolted tab joints with star washers do not.
Ingress: IP54 is the floor for indoor AMRs, IP65 with a breather membrane for food, pharma and any robot that will ever see a pressure washer. The breather is not optional — a sealed enclosure cycling between a 5 °C loading dock and a 35 °C warehouse will pull moisture past any static gasket.
Step 5: Thermal Integration Inside a Sealed Chassis
My first semi-solid AMR build had a fan. It lasted one month in a cardboard-dust environment before the filter blinded and the pack went into thermal derate every afternoon. There is no forced air in a robot. Everything conducts to the chassis.
The good news is that if you do the RMS calculation honestly, the heat is small. Using the Step 1 budget: 7 A baseline with 70 A peaks at 2% duty gives Irms = √(7² + 0.02 × (70² − 7²)) ≈ 12 A. At 14 mΩ pack resistance that is about 2 W of continuous heating. Peak events are absorbed by thermal mass: 70 A for 3 s is roughly 70 W for 3 s = 210 J into a 15 kg pack with about 900 J/kg·K of effective heat capacity, which is a temperature rise of 0.016 K. Transients are free.
So the thermal design job is not peak removal, it is steady-state spreading. My rules:
- Bond the pack base to a 6–10 mm aluminium chassis plate using a 1.5–3 W/m·K gap filler at a 0.3–0.5 mm bondline. Do not rely on air; a 0.2 mm air gap is worth about 15 K at these power levels.
- Keep cell-to-cell spread under 5 K target, 8 K limit. Spread kills you long before absolute temperature does, because the BMS derates on Tmax while the cold cell is the one being undercharged.
- Design to a 45 °C ambient. Cells above 45 °C age roughly twice as fast for every additional 10 K, and the robot will spend at least one week a year in a hot building.
- Charge window 0–45 °C, discharge −20 to +60 °C, sweet spot 15–35 °C. Below 5 °C, either heat the pack or cut charge current to 0.1–0.2 C. Semi-solid cells are worse than liquid LFP at −10 °C, and pretending otherwise is how you get plating.
- If the robot has a cold-chain or outdoor variant, budget 150–400 W for a pad heater and accept 20–40 minutes of preconditioning. That is a real operating cost and it belongs in the fleet model.
Step 6: Hot-Swap, Opportunity Charging, and Dock Contacts
There are two swap architectures and I push customers hard toward the second one only when they actually need it.
Controlled shutdown swap
The robot parks, saves state, opens the contactor, and the technician exchanges the pack in 40–60 seconds. Reboot and re-localisation cost another 30–90 seconds. Total dead time under 2.5 minutes, per swap, maybe twice a shift. This is simple, has no arc-flash exposure, and is what I recommend for 90% of fleets.
Ride-through hot swap
When the robot cannot lose its compute — hospital delivery, cleanroom material handling, anything with a live safety PLC — you need a ride-through supply. Size it from the load: industrial PC plus safety PLC plus comms is 60–120 W at 24 V; 15 s of hold-up is 0.9–1.8 kJ. A 24 V, 20 F supercapacitor bank discharged from 24 V to 18 V gives 0.5 × 20 × (576 − 324) = 2.5 kJ, comfortably inside the requirement with margin for ageing. I prefer supercaps to a small lithium buffer here: 500 000–1 000 000 cycles, −40 to +65 °C, and no maintenance or state-of-charge management.
Getting the dock contacts right
Contacts are the highest-failure-rate component in any opportunistic-charging fleet, and they fail thermally rather than mechanically. My specification:
- Silver-plated copper, 2–4 pins per polarity in parallel, 0.3–0.8 mΩ per pin, 1.5–3 mm wipe, 5–15 N spring force.
- Rated 10 000–50 000 mating cycles, with the wipe length sized so that the plating is not consumed at end of life.
- Pilot pin that is last-make-first-break, wired into the enable loop so the contactor can never close into an unmated dock.
- Precharge through a 10–22 Ω / 50 W wirewound resistor before the main contactor. With a 10 mF DC-link at 48 V the stored energy is 11.5 J and 5τ is about 0.5 s at 10 Ω, so a 0.3–0.5 s precharge window is realistic and keeps inrush near 5 A.
- Charging at 2–3 C (140–210 A on 70 Ah) is fine if contact resistance stays near design: 150 A across four pins at 0.5 mΩ is 0.25 mΩ total and about 5.6 W. Wear or misalignment that takes a pin to 2 mΩ puts 45 W into a plastic housing.
- Monitor it. Either a thermistor on the contact block or a periodic four-wire voltage-drop measurement; replace when the drop rises more than 30% from the commissioning baseline.
Step 7: BMS-to-Controller Integration — CAN, SoC Truth, and Fleet Telemetry
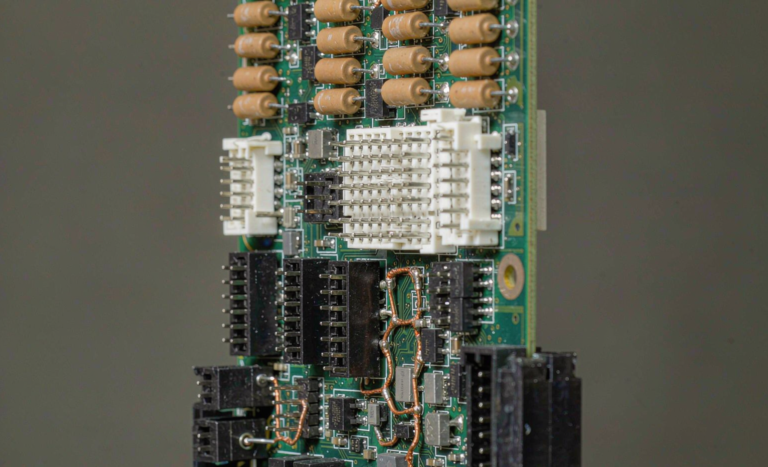
I insist on a documented DBC file or a CANopen object dictionary, not a proprietary hex dump. Minimum message set, on CAN 2.0B at 500 kbit/s:
- Pack status at 10 Hz: pack voltage, current, SoC, SoH, Tmax, Tmin, cell Vmax, cell Vmin, contactor state.
- Limits at 10 Hz: max discharge current, max charge current (this is the regen limit from Step 3), max regen power.
- Alarms event-driven with a latched fault register readable over the service tool.
SoC truth is harder with NMC-based semi-solid than with LFP
A semi-solid NMC cell has an OCV slope of roughly 3–8 mV per percent SoC through the 20–80% window. That is better than LFP, which is 2–3 mV/%, but it is still not enough for voltage-only estimation: reading OCV to ±10 mV already puts you at ±1.5–3% SoC before sensor error, and under load the terminal voltage is useless because IR sag dwarfs the OCV signal. So:
- Coulomb count as the primary estimator with a shunt or Hall sensor at 0.5–1% accuracy, temperature-compensated.
- Recalibrate against OCV only after a genuine rest — 30 minutes with current below C/50 — and only outside the flat region.
- Force one full charge per week per pack for fleet calibration. I schedule it into the fleet manager, not into the technician’s memory.
- Publish SoC to the fleet manager with an uncertainty band. A mission planner that thinks it knows SoC to 1% will strand robots; one that knows it to ±4% will plan conservatively.
Track SoH the same way: capacity from full-charge coulomb count, and DCIR measured at a defined current step and temperature. Retire a pack at 80% of nameplate capacity or 1.3–1.5× BOL DCIR, whichever comes first, and let the fleet manager assign high-SoH packs to the longest routes.
Step 8: Safety-Rated Shutdown, Compliance, and Warehouse Fire Codes
If opening the contactor is part of a stop function — and on a mobile robot it almost always is — then it is a safety-related part of a control system and it gets designed to ISO 13849-1 or IEC 62061. In practice that means a redundant contactor pair with monitored feedback, diagnostic coverage on the coil drive, and a target of PL d / Category 3 for the traction-power removal path. A single contactor driven by a GPIO is not a safety function; it is a convenience.
Whatever chemistry you land on, the integration discipline is the same, and it is the part most battery solutions suppliers skip: model the duty cycle, define the regen interface, design the safety path, then prove it on the machine rather than on the bench.
The standards stack I work to on a semi-solid robotics programme:
- Cell and pack: IEC 62619 (secondary lithium for industrial applications) is the core document; IEC 62133-2 for small portable and handheld robots; UN 38.3 T1–T8 with a real test summary for transport, shipped as UN3480 at ≤30% SoC.
- Machine integration: IEC 60204-1 for the electrical equipment of machines; ISO 12100 for general machinery safety; ISO 10218-1/-2 for industrial robot cells; ISO/TS 15066 where humans share the workspace.
- Mobile platform: ISO 3691-4 internationally, ANSI/RIA R15.08 in the US, and ANSI/ITSDF B56.5 for driverless automatic guided industrial vehicles. These drive your tip-over, braking and clearance calculations, which is where the Step 4 centre-of-gravity work pays off.
- EMC: IEC 61000-6-2/-4 or EN 12895 as applicable, CISPR 11 for emissions. Regenerating drives put real ripple on the DC bus; size DC-link capacitance so ripple stays below 5–10% of pack current, both for heating and because ripple corrupts DCIR-based SoH trending.
- Installation: NFPA 855 and FM Global guidance for charging rooms and separation distances, even though semi-solid cells carry substantially less free electrolyte and propagate more slowly than liquid cells. Do not argue this with an authority having jurisdiction; bring test data and a planned layout.
- Market access: EU 2023/1542 with the digital battery passport obligation from February 2027, and (EU) 2023/1230 Machinery Regulation for the robot itself.
Step 9: Commissioning, Acceptance, and Fleet Rollout
I do not sign off a pilot fleet on bench data. Every pack gets the following before it goes on a robot, and the results are filed against the pack serial number:
- Insulation resistance at 500 V DC: reject below 1 MΩ; healthy packs read tens of MΩ.
- Cell balance at 40–60% SoC: reject above 30 mV spread.
- Capacity check at C/5: must meet or exceed nameplate.
- DCIR baseline recorded per pack, at a stated temperature and current step, so you have a BOL reference.
- Precharge timing measured on the robot: DC-link must reach 90% of pack voltage in 0.3–0.5 s.
- Duty-cycle soak over a full 8–10 hour shift: Tmax ≤ 55 °C, cell spread ≤ 8 K, no BMS derate events.
- Dock contact thermal check: rise ≤ 30 K at maximum charge current after 50 mating cycles.
- CAN log review: zero regen-limit violations, zero uncommanded contactor openings. If the log shows the BMS limiting regen more than once an hour, the pack is undersized or the route has a ramp you did not model.
- Torque audit with witness marks: M6 busbar joints 8–10 N·m, M8 12–15 N·m, re-torqued after the first 50 hours.
- Emergency stop verification: contactors open within 200–500 ms of the safety input, confirmed at the safety PLC, three consecutive times.
Then roll out in waves: 10 units for 4 weeks with weekly log pulls, then 50, then the fleet. The first wave always finds one thing the bench did not, and on semi-solid packs it is usually stack pressure relaxation or a regen profile nobody modelled.
Frequently Asked Questions
Can I drop a semi-solid pack into a robot designed for a 48 V lead-acid or LFP pack?
Mechanically, often yes, and that is the appeal. Electrically, check three things before you try. First, string voltage: a 16S LFP pack charges to 58.4 V, and a 13S semi-solid NMC pack charges to 54.6 V — the robot’s charger and its “battery present” detection thresholds may not recognise the new pack. Second, charge acceptance: semi-solid NMC wants CC/CV to 4.20 V with a C/20 taper termination, and it must never see a lead-acid equalisation pulse or an indefinite float. Third, regen: see Step 3. I have converted fleets this way, but every one of them required a charger firmware change and a BMS-to-controller interface definition.
Why not just use LFP and accept the weight?
For a slow, large, low-duty AGV, LFP is frequently the right answer and I will say so: 3 000–6 000 cycles, better thermal margins, cheaper per kWh, and far more tolerance of abuse. Semi-solid earns its place when the energy budget is tight against a mass or volume envelope — long shifts with no dock time, compact chassis, legged platforms, or anything airborne-adjacent. If your robot has a 200 kg chassis and a fixed dock every four hours, the semi-solid premium is hard to justify.
How many cycles should I plan for in a fleet business case?
I model 1 200–2 000 cycles to 80% capacity for current-generation semi-solid cells under a mixed 1 C / opportunistic 2.5 C duty with good thermal management, and I do not model above 2 000 no matter what the cell datasheet says. At two full equivalents per day that is 2–3 years of service, so the business case has to include a pack refresh provision. If a supplier quotes 5 000 cycles without a temperature, a charge rate and a DoD attached to the number, treat it as marketing.
Do semi-solid packs need cooling?
In a typical indoor AMR, no: conduction to the chassis is sufficient, and the RMS heating is on the order of 2–5 W. Add active thermal management when continuous current exceeds about 1 C, when ambient regularly exceeds 45 °C, or when the enclosure is fully sealed with no chassis conduction path. Legged platforms with sustained 5 C+ operation need a cold plate, and at that point you should be asking whether a supercapacitor buffer is the cheaper fix.
What is the biggest integration risk specific to semi-solid?
Stack pressure, and it is not close. Every other failure mode — regen clamping, contact wear, SoC drift — has an analogue in liquid-cell integration that experienced teams already know how to handle. Maintained, uniform compression on the electrode stack is new, it is invisible once the pack is closed, and it fails gradually enough that you will not catch it without DCIR trending. Specify the pressure, specify the compliance layer, put it in the frame rather than the enclosure, and measure stack thickness at 0 and 500 cycles.
Can the robot charge while it is moving, or only at a dock?
Contact-based opportunity charging at a dock is the mainstream answer: 2–3 C for 10–15 minutes, 140–210 A on a 70 Ah pack. Inductive charging works and I have deployed it on cleanroom and hospital robots where contacts were a contamination or reliability problem, but budget for 85–92% efficiency against 97–99% for contacts, and treat the coil-to-coil alignment tolerance as a mechanical design driver in its own right. Continuous in-motion charging over a conductive floor is technically possible and, in my view, an infection-control and maintenance liability for most fleets.
How do I handle shipping spare packs?
UN 38.3 T1–T8 with a test summary on file, packed to UN3480 for standalone lithium-ion batteries or UN3481 when packed with or contained in equipment. Air freight requires state of charge at or below 30%. Store the spares at 30–50% SoC in a dry, tempered space and top them up every six months; a spare pack left at 100% SoC in a warm warehouse will arrive at the customer already aged. Keep the EU battery passport data current if you ship into Europe, because the February 2027 obligation lands inside most fleet lifetimes.
Should the BMS or the robot controller own the state-of-charge decision to return to dock?
The robot controller owns the mission decision; the BMS owns the truth and the limits. What I specify is a low-SoC warning at 3.20 V/cell under load (41.6 V on 13S) published by the BMS, and a fleet-manager policy that dispatches the robot to a dock at a defined SoC floor with enough margin for the longest route segment. Do not let the BMS hard-open the contactor at the functional low-SoC point — that strands the robot in an aisle. Reserve contactor opening for genuine cell-level faults.